I am serious when I say these are the tastiest baked chicken tenders recipe I have ever tried. They stay soft, well seasoned, and need just a few minutes to get ready. No bread coating required!
Many people cook their chicken tenders way too long. If you have been baking your chicken strips in the oven for over 15 minutes, they are likely overdone. That turns them into dry chicken that feels like dust in your mouth.
With this simple chicken recipe, I will teach you how to make the tastiest oven baked chicken tenders using basic ingredients.
Enjoy them with your favorite dipping sauce and pair with mashed cauliflower or a fresh salad on the side for a healthy dinner.
Ingredients needed
- 1 pound of chicken tenderloins (8-10) – if you want to skip the hard tendon found in a tenderloin, you can use chicken breast cut into strips.
- I will show you an easy way to take out that tendon in only 10 seconds down below.
- 2 tablespoons oil – I prefer avocado oil but olive oil or vegetable oil works as well.
- 2 tablespoons Tamari – this is a gluten free choice instead of soy sauce, with a smoother taste and less salt.
- 1 teaspoon garlic powder, 1 teaspoon Italian seasoning, and ¼ teaspoon black pepper
How to make healthy baked chicken tenders
These homemade chicken tenders don’t need any breadcrumb coating, making them great for anyone on a gluten-free diet. That also means you spend less time preparing!
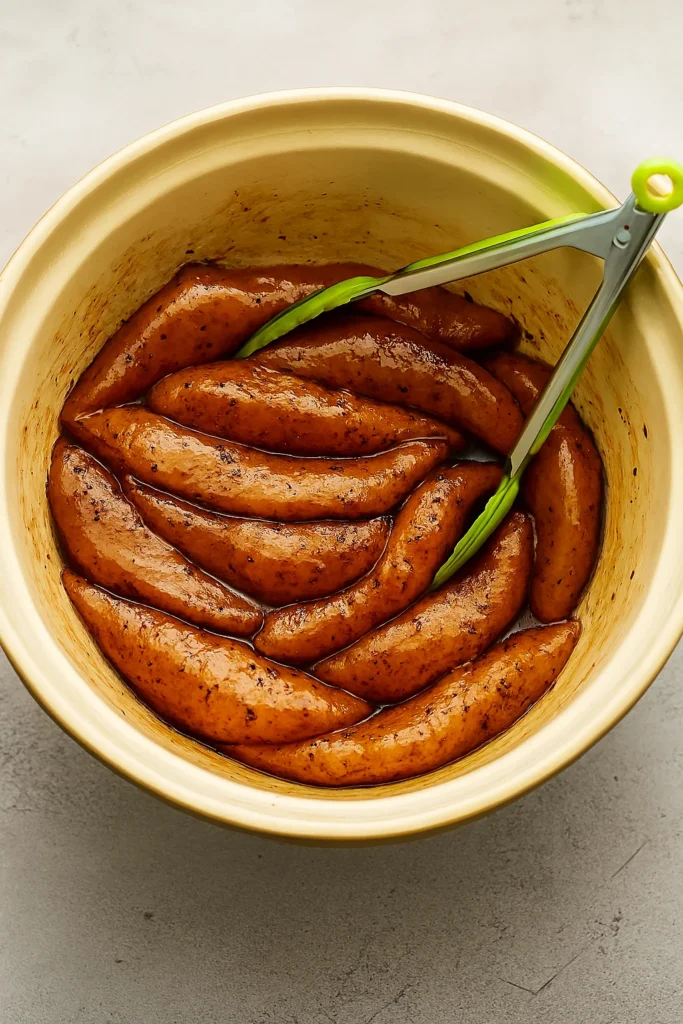
1. Heat the oven to 350 degrees F and marinate the tenders: In a medium bowl, mix the chicken strips with the oil, tamari, and spices. For best flavor, allow the coated tenders to rest in the bowl as the oven warms, soaking in the marinade.

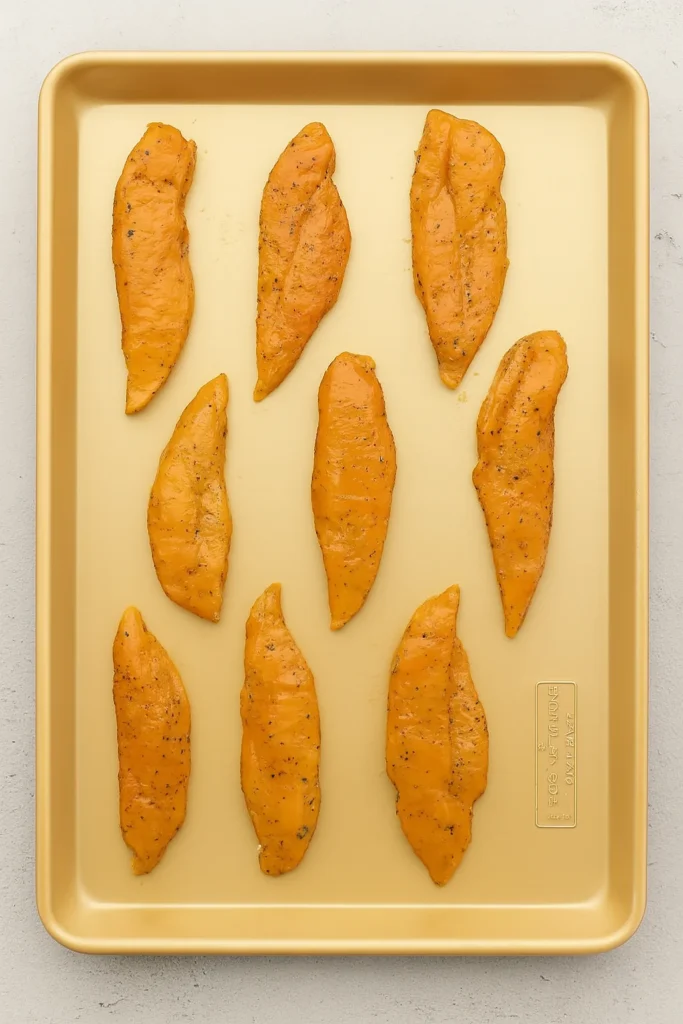
2. Arrange the chicken pieces on a baking sheet in one even layer. You can line the pan with parchment paper if you prefer quicker cleaning.
3. Cook them in the heated oven for 15 minutes, or until a thermometer shows the inside temperature has reached 165F.
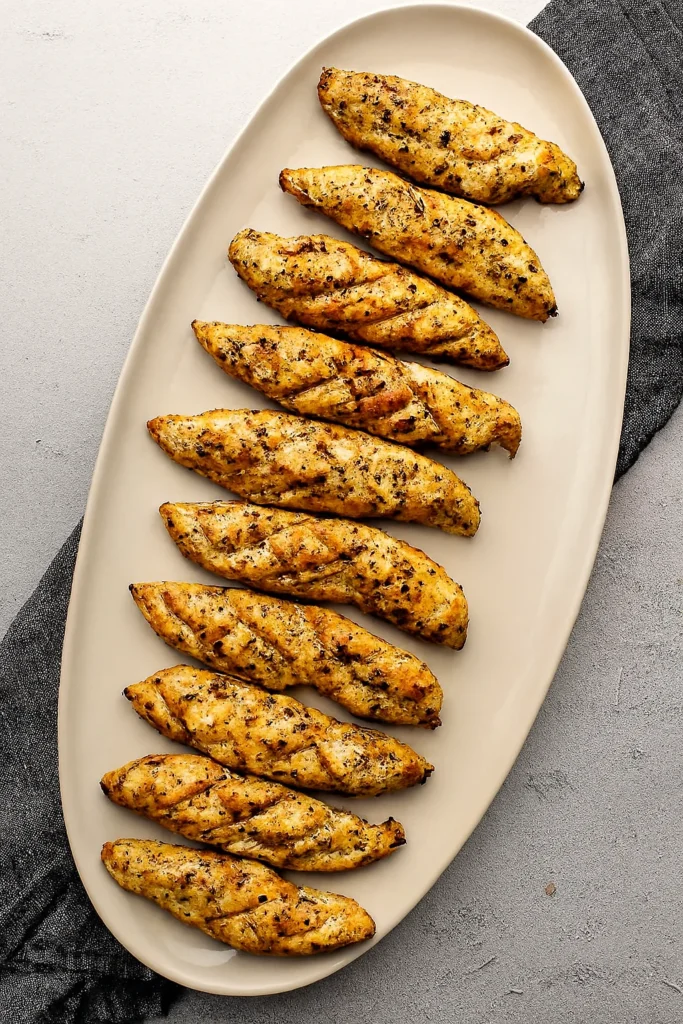
As you can see, this chicken tenders recipe produces golden brown, juicy chicken without a crunchy coating that will be soggy 5 minutes later.
How to remove the tendon from chicken tenders
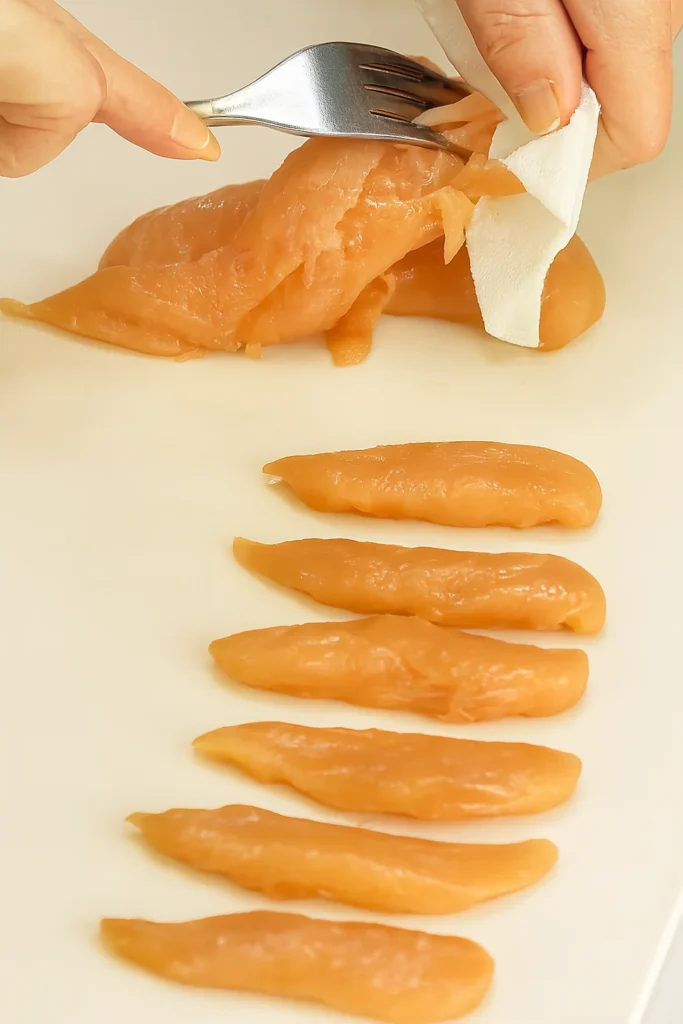
Your chicken tenders won’t turn out their best if that hard tendon is still running through the middle. I will show you the easiest way to pull it out in only 10 seconds.
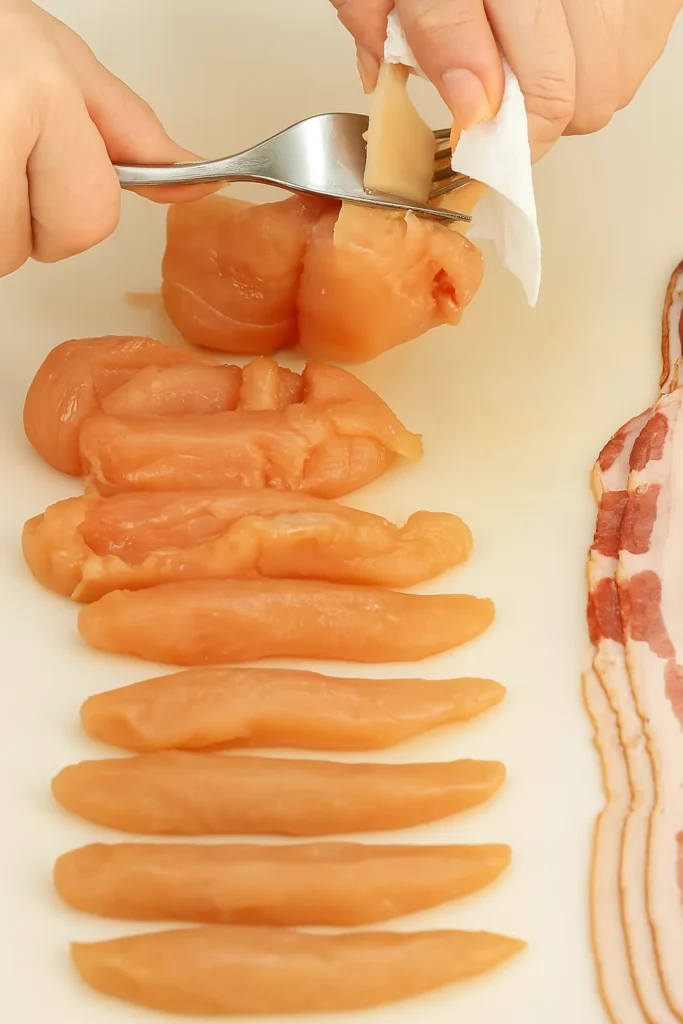
Hold the tendon with one hand using a small paper towel. With your other hand, slide the tendon between the prongs of a fork.
With one firm motion, pull the tendon upward using the paper towel while pressing the chicken tender downward with the fork. The tendon should slide right out.
This may split your tender nearly all the way down the middle, but I would still prefer that instead of chewing a tough tendon in chicken.

Baked Chicken Tenders Recipe
Ingredients
Equipment
Method
- Preheat oven to 350°F (175°C). Prepare a rimmed baking sheet (no lining needed as tenders are coated in oil).
- In a bowl, mix chicken tenders with oil, tamari, garlic powder, Italian seasoning, and black pepper. Let rest while oven heats.
- Arrange chicken in a single layer on the baking sheet.
- Bake for 15 minutes, or until internal temperature reaches 165°F (74°C). Thinner tenders may cook faster, so check with a thermometer.
- Remove from oven, rest for 2 minutes, and serve warm with dipping sauce and a fresh salad or mashed cauliflower.